
Client3D is a free, GPL'ed, portable (Java) Framsticks client for the Framsticks server. It was created by Marcin Ignac and then extended by Marcin Nowak. This program brings 3D visualization of the framsticks world to your desktop.

Installation
To run Client3D, you need java 5 or newer. If you don't have java, install Java Runtime Environment.
Next follow the steps listed below depending on your operating system:
Windows
Download client3d-win.zip and unpack it. Double click on run.bat to run.
macOS (Intel)
Download client3d-osx.dmg image, mount it and run Client3d.app.
Note: this distribution hasn't been updated for some time so it misses a number of features. If you have a Mac, you can build the most recent application from sources.
You will also need the Cg toolkit (see "Install Packages").
Other systems
You can try to run Client3D on other operating systems too. Just grab JOGL binaries from https://jogl.dev.java.net/ and unpack them to lib/ folder from client3d-other.zip archive.
You will also need the Cg toolkit (see "Install Packages").
Finally run following command from terminal / command line (the actual syntax depends on your operating system):
java -classpath lib/jogl.jar;lib/foxtrot.jar;lib/framsticks-jogl.jar -Djava.library.path=lib com.framsticks.net.Client3D.App
Using Client3D
Client3d application consists of two windows:
- preview / visualization window
- main window with log listing
Available menu options
Server
Click Connect option from Server menu, enter server IP address and port and click OK. If everything went good you should see framsticks world in preview window.
If you wont only to play with Client3d without connecting to any server you can click Test mode option from Server menu. Example world with some framsticks will be loaded and you will be able to see visualization in action.
To disconnect from server choose Disconnect option from Server menu.
Simulation
Init – initializes genepools Start – starts simulation Stop – stops simulation Refresh creatures – updates creatures (genotypes, positions, etc.) Refresh world – updates world (structure, water level, etc.)
Styles
To change rendering style of framstick creatures simply choose one of the options from Style menu:
Basic
|
Fur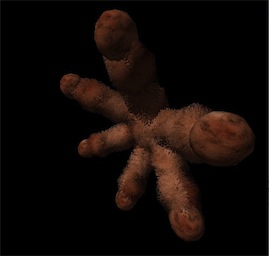
|
Stone
|
Metal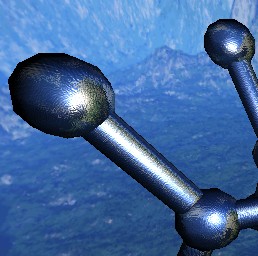
|
Cartoon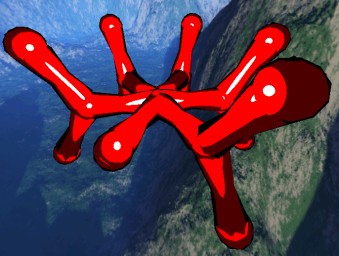
|
Glass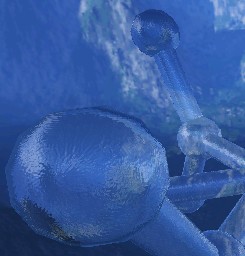
|
View
This menu enables you to switch between rendering whole world and focusing on one particular creature.
Options
Autorefresh – if this option is enabled simulation state will be constantly updated without need to choose Refresh creature option manually every time. Before turning this option on you should disable logging to achieve better performance. Logging – enables / disables logging
Navigation in the 3D world
Currently only rotation of the whole world is available. Just press left mouse button anywhere in preview window and move mouse left/right to rotate the world (don't release mouse while moving).
Technical issues
All styles (except for the Basic one) use some advanced OpenGL features, so recent graphics card is required supporting Shader Model 2.0 or newer (GeForce 5+, Radeon 9xxx, X800...).
Code
Source
In this project I've used some classes from JAVA Virtual World Client developed by MoMaT netclients.
3rd party libraries
- foxtrot – "an easy and powerful API to use threads with the Java Foundation Classes (JFC/Swing)" http://foxtrot.sourceforge.net/
- jogl – "Java bindings for OpenGL API" https://jogl.dev.java.net/
World boundaries
Fence
| Teleports
| No boundaries
|
Adding a new style
Rendering styles is done with the use of the CgFX technology. Each style is defined with a *.cgfx text file in the res/shaders directory. To add a new style, simply add your style definition file to the style directory. Client 3D will read it and add a new style button after the program is restarted.
If you are not familiar with the CgFX technology, you can read more about Cg and CgFX in the user manual here.
Techniques
Each CgFx style defines at least one technique. Each technique defines actions that are necessary to achieve the visual result desired. Each technique has different hardware requirements and a different target:- parts
- joints
- both
If there is more then one technique with the same target, the framstick client will use the one which will be validated as first (first in a style file). That property is used to select the technique for the newest hardware possible. That is why techniques should be sorted with descending order of system requirements.
Techniques target is defined in the annotation string as shown below:
technique myTechniqe <string target = "both";>
{
	pass p0
	{
	}
}
defines an empty technique named myTechniqe for rendering both part-objects and joint-objects.
Semantics
CgFX technology uses special keywords that give special meaning to program variables. Framsticks Client 3D uses the following keywords:- ModelViewProjection to define ModelView-Projection matrix. Variable with this semantic should be 4x4 matrix as shown in following example:
float4x4 mvp : ModelViewProjection; - ModelView to define ModelView matrix in identical way, for example:
float4x4 mv : ModelView; - ModelViewIT to define ModelView matrix which is inversed and transposed:
float4x4 mvit : ModelViewIT; - SKYBOX to define skybox sampler variable. Skybox can be represented only by cubemap sampler as shown in following example:
samplerCUBE skybox : SKYBOX;
Geometry
It is possible to use geometries other then the default one for rendering part and joint objects.- To change geometry for part-objects add following string:
string partGeo = "myFile.obj";
- To change geometry for joint-objects add following string:
string jointGeo = "myFile.obj";
Textures
Texture definition is best described by example:sampler2D normal<string fileName = "myTexture.tga";>;where normal is variable name, myTexture.tga is texture file name. All texture files are place in res/img directory.
It is also possible to define opengl texture states like min. filter, mag. filter, wrapS, wrapT and so on, as shown below:
sampler2D normal<string fileName = "myTexture.tga";> = sampler_state {
  minFilter = Linear;
  magFilter = Linear;
  wrapS = Repeat;
  wrapT = Repeat;
};
Development
To build targets in eclipse, right-click on "build xml", select "Run As" Ant Build..., and then select the target to execute (e.g., "dist-win").