An OpenGL visual style for the Framsticks environment by Stanisław Myszkowski.
Introduction
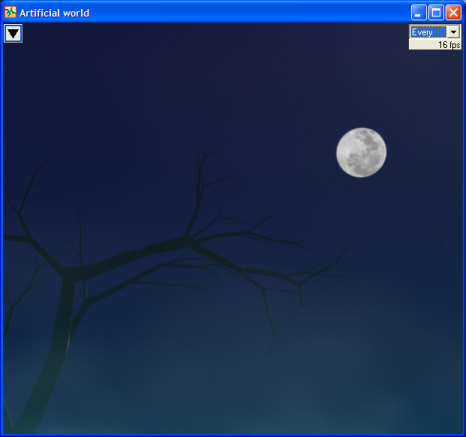
Why spooksticks? Well, I thought this would be quite amusing to see skeleton-like creatures wandering around. Of course, the scenery should be adequate: a foggy, abandoned cementary, with some leafless trees nearby, somewhere around midnight, lit by full moon, should do the trick.
Element representation
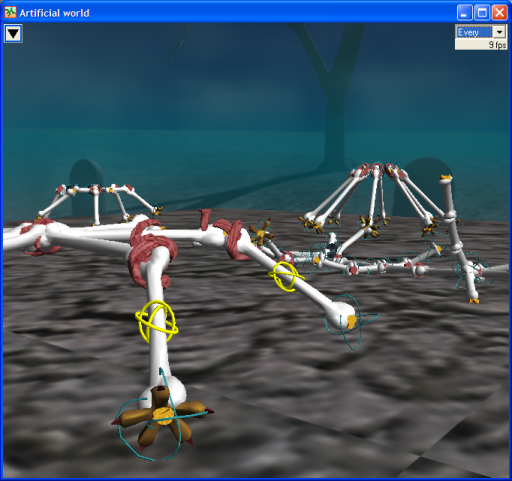
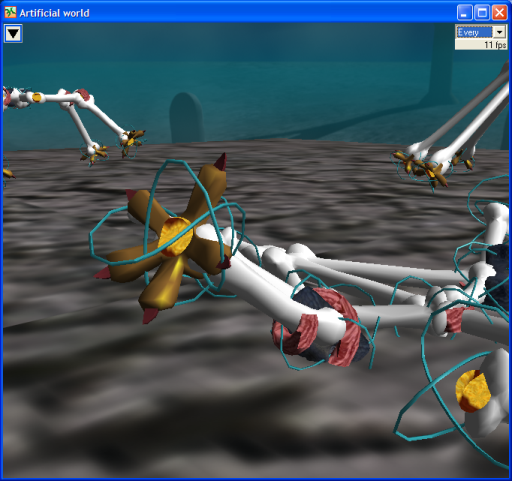
I've chosen to represent certain parts of a creature (joints, parts, neurons) in a way that resembles their natural counterparts. Hence we have bones that represent joints, bending and twisting muscles that correspond to the appropriate '|' and '@' neurons. There is also a claw that imitates the touch ('T') sensor, a nose ('S'mell) and a gyroscope ('G') for the equilibrium sensor.
Availability
You can activate OpenGL Spooksticks style in the Framsticks GUI. Source available in the 3dobj/spooksticks subdirectory. To see this style, launch the program, go to 'Interface options' dialog, and select 'Visual style' from the left pane. In the right pane, in the topmost drop-down list, select 'spooksticks' and press 'OK'.
Screenshots
Get a glipmse of the Spooksticks style.


Defining visual styles
This section lists the steps you should perform in order to create your own visual style.
Step 1 - where do I start?
Perhaps the easiest way to start is to take the standard style and modify it. For this purpose, create a new directory for the newly-developed style and copy over standard.style, renaming it to this.style.
Step 2 - make the models
Two approaches are possible here: one of them is to use stored geometry (in files), the other (and more challenging perhaps) is to use procedural geometry. It is up to you which one of them you use, however, you must remember to preserve the right scaling when using file-based geometric objects (meshes). Geometry must be scaled so that it doesn't appear too small or too big. A good rule of thumb is to use a joint that is of 1.0 units in length and scale all other elements relative to the former.
There are numerous 3D-geometry editors available, and the only constraint on using them is that you need to export the geometry to a file format Framsticks can handle (see docmentation for the list of supported formats). Here, I used the industry-standard 3DS format. The AC3D format is also supported. Try to keep in mind that your geometric parts shouldn't be too complex, unless you plan to use it only on a really powerful hardware (the key element here is the graphics adapter). Models with vertex and face counts that exceed 700-1000 will most likely degrade performance.
A good model gets the final touch by applying a realistic texture. When using textures, make sure the exported file references any textures relatively, that is, through bare filenames only (i.e. not like 'C:\maps\mytex.png', only 'mytex.png'). Supported textures include the PNG format.
Also, you might consider using your own skybox (6 images displayed inside a large, surrounding cube that constitute a panoramic background effect). To do that, create six texture files, named, for instance skybox_.png, where the underscore is replaced by digits 1-6 (e.g. skybox1.png), but left in the script file.
Step 3 - edit the script
After putting all the models and textures into the previously-created directory, you should edit the style script.
The file is an ordinary text file that contains FramScript. Alter the style name, description and model building/updating functions to use your new elements (you can use an Eclipse editor plugin, Framclipse). If you wish to build some procedural geometry, use the VertexBuilder class - this is useful for building the world landscape (see reference for usage hints).
Remember to implement various world variants - don't forget water, block-world, height field, teleports, fences, etc.
Step 4 - launch Framsticks
When you're done with the script, try launching the environment. First, load some genotypes and simulate a few creatures. Then hit Ctrl+I to bring up the display options dialog. Here, select 'Visual style' from the left pane and select your style from the drop-down list. Close the form by choosing 'OK' and try switching to the OpenGL mode. To do this, open the context menu of the 'Artificial world' window by clicking the arrow-labeled box, then select '3D OpenGL view'.
If everything goes right, you should see your style in action. If not... well, don't give up. Check your models, textures and the script, then try again.
There is one more description of a new style design in Polish.

